

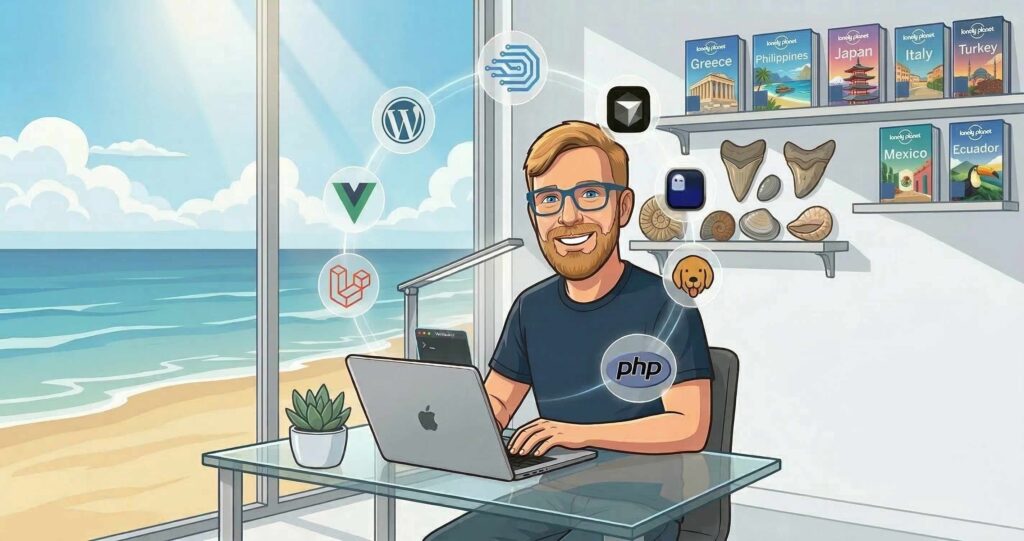
I’ve been a Mac user since I bought my M1 MacBook Air back in 2021. At the time I just could not stick with Windows because the value for money for the M1 was just so amazing. For a long time, it was the perfect machine for my work and personal needs. But over the past year, as I started integrating more local AI tools into my daily workflow, despite upgrading the base 8GB of RAM to 16GB, it really started to show its age. So, I took the plunge and upgraded to the new MacBook Pro M5 Pro.
Sitting in front of that fresh macOS desktop, I made a strict promise to myself: I am not going to make the same mistakes I made last time.
I was probably the worst case scenario. I am not a full-time developer and I don't code every single day. I wear a lot of hats, hopping between operations work and productivity tools, managing projects, and jumping on client calls. So my old M1 wasn't just struggling because of the hardware; it was suffocating under years of fragmented, heavy developer tools that were running 24/7, even when I hadn't written a line of code in weeks.
I had a graveyard of dev environments. I had "Local" taking up gigabytes for WordPress sites, Laravel Valet fighting with Homebrew over which version of PHP owned port 80, and Laravel Sail spinning up heavy Docker containers. My Node paths were a confusing mess of global installs. My background was filled with heavy, electron-based resource hogs like Postman, VSCode, and local development tools eating my RAM for breakfast while I was just trying to answer emails.
Because coding is just one part of my workflow (more often a passion or hobby project), I realized I needed a setup that was modular and heavily containerized. Most importantly, it had to be something I could completely turn off when I wasn't using it, so my system resources stayed at 100% for my actual day-to-day tasks.
Here is the methodology I use to maintain a clean, containerized macOS environment.
Before installing a single app, I set some ground rules to keep myself disciplined:
brew services start are forbidden for anything related to coding.When migrating, it is much safer to grab only the essentials. Using Cmd + Shift + . in Finder reveals the hidden files needed to retain access and configurations without bringing over the bloat. The essential files to back up for me included:
~/.ssh/ (The entire folder to keep keys safe).env files.There are others that you may consider but I made the decision to “re-setup” things like Git for my projects.
While I'm ruthless about keeping dev tools out of my background processes, I do rely on a few lightweight, purpose-built utilities to keep my actual day-to-day productivity flowing smoothly. These are the tools that earn the right to run all the time:
stats via Homebrew).I begrudgingly use iCloud Drive for basic documents, but it's not good for project folders because of the node_modules or vendor folders. To avoid these issues, I create a dedicated space right at the root of the user directory that iCloud cannot touch.
mkdir -p ~/Dev/{Work,Personal,Playground,Archived}
I also use an "Umbrella" grouping for projects that have multiple repositories. Under ~/Dev/Work/, I create a folder for a specific projects, and inside that, I place the API repo, the frontend repo, and the design assets. It keeps everything tightly scoped.
When I do need to write code, I rely on a stack chosen specifically to replace historically heavy applications with native, lightweight alternatives. After installing Homebrew, I pull them in:
brew install --cask orbstack ghostty cursor bruno
Every app in that list fixes a specific performance bottleneck I hated on my old Mac:
Installing Node globally or wrestling with Node Version Manager (NVM) always ended up polluting my terminal startup times or giving me weird permission errors. I wanted a system that managed versions automatically per-project without making me think about it.
I landed on Fast Node Manager (fnm). It's apparently built in Rust, feels instantaneous, and keeps things sandboxed.
brew install fnm
Adding this to the ~/.zshrc file ensures it reads the .nvmrc or package.json file and automatically switches Node versions whenever I navigate into a project folder:
eval "$(fnm env --use-on-cd --version-file-strategy=recursive)"If you spend a lot of time in the terminal, you know how quickly a default prompt can become visual clutter. By default, many setups display your username, your machine's hostname, and the entire file path. When you are deeply nested in a project directory, this leaves you with almost no room to actually type your commands.
We can strip away that noise and build a minimalist, highly functional prompt that shows only what you actually need: your current folder and your active Git branch. Even better, we can make that branch dynamically change colors based on whether your repository is clean (green) or has uncommitted changes (red).
In Zsh, you can achieve this without installing heavy third-party themes. By leveraging Zsh's built-in vcs_info and a simple precmd hook, you can inject Git data directly into your PROMPT variable.
Here is the breakdown of the magic in the PROMPT string:
%1~: Drops the bulky path and user@host details, leaving only the name of your current directory.${vcs_info_msg_0_}: Dynamically injects the current Git branch and its status.%#: Keeps things standard by displaying a % for regular users, and switching to a # if you drop into root.Here is the complete configuration to add to your .zshrc file (nano .zshrc):
autoload -Uz vcs_info
setopt PROMPT_SUBST

# Configure vcs_info to check for staged/unstaged changes
zstyle ':vcs_info:*' enable git
zstyle ':vcs_info:*' check-for-changes true

# Define the colors: Green (%F{green}) for clean, Red (%F{red}) for dirty
# %b is the branch name, %u is the "unstaged" check, %c is "staged"
zstyle ':vcs_info:git:*' formats '%F{green}(%b)%f '
zstyle ':vcs_info:git:*' actionformats '%F{yellow}(%b|%a)%f '
zstyle ':vcs_info:git:*' unstagedstr '%F{red}'
zstyle ':vcs_info:git:*' stagedstr '%F{red}'

# Use a hook to swap the color if changes exist
precmd() {
    if [[ -n $(git status -s 2> /dev/null) ]]; then
        zstyle ':vcs_info:git:*' formats '%F{red}(%b)%f '
    else
        zstyle ':vcs_info:git:*' formats '%F{green}(%b)%f '
    fi
    vcs_info
}

# Set the prompt (Folder + Branch + Symbol)
PROMPT='%1~ ${vcs_info_msg_0_}%# '
This was the hardest part of the journey. In the Laravel and WordPress worlds, we have an intimidating number of options when it comes to local dev tools. But because I don't code full-time, they all had trade-offs that broke my golden rules and with some legacy projects not supported by more modern solutions, it meant needing to support different approaches leading to clutter.
That’s when I finally gave DDEV a real try.
DDEV hit the exact sweet spot. It is strictly container-based (which keeps the Mac clean), it automatically handles local SSL certificates (https://my-app.ddev.site), it provisions the exact database you ask for, and it works beautifully alongside OrbStack. It abstracts away the complex docker-compose boilerplate while giving me the modularity I need to turn it all off when I'm done.
brew install ddev/ddev/ddev
mkcert -install
I immediately ran into a challenge. I use the official Laravel interactive installer as a rule, which is the one that prompts you in the terminal for your starter kit, authentication preference, your testing framework, and your database choice. Unfortunately, there’s no way to access the same choices using the standard composer installation method.
Because I refused to install PHP globally on my Mac, I couldn't run laravel new. The logical solution was to run it inside the DDEV container. The problem is, Laravel's installer refuses to build a project if the folder isn't completely empty, and DDEV requires a hidden .ddev folder to be there to run.
I figured out a fun workaround: scaffold the app into a temporary folder inside the container, move the files up, and clear the absolute paths the installer cached. Here is the exact flow I use now:
cd ~/Dev/Work
mkdir my-new-app && cd my-new-app

# Configure DDEV (e.g., --database=postgres:15)
ddev config --project-type=laravel --docroot=public
ddev start

# Jump inside the container's isolated terminal
ddev ssh

# Install the true Laravel Installer globally inside the container
composer global require laravel/installer

# Run the installer into a temporary folder to trigger all the prompts
$(composer global config bin-dir --absolute)/laravel new temp-app

# Move the generated files to the root directory and clean up
cp -a temp-app/. .
rm -rf temp-app

# CRITICAL FIX: Clear the absolute paths cached during the temp installation
rm -rf bootstrap/cache/*.php
composer dump-autoload

exit

# Re-scan the folder so DDEV opens the right ports and injects DB Credentials
ddev config --project-type=laravel
ddev restart
The next hurdle was the frontend. The first time I fired up my new Vue/Laravel app inside DDEV, I was greeted with a completely blank white screen.
Vite tries to load its hot-reloading assets from localhost by default. Inside DDEV's secure HTTPS environment, the browser blocks this as mixed content. The fix was telling Vite to route securely through DDEV's primary URL. I updated my vite.config.js to this:
import { defineConfig } from 'vite';
import laravel from 'laravel-vite-plugin';
import vue from '@vitejs/plugin-vue';

export default defineConfig({
    plugins: [
        laravel({
            input: 'resources/js/app.js',
            refresh: true,
        }),
        vue({
            template: {
                transformAssetUrls: {
                    base: null,
                    includeAbsolute: false,
                },
            },
        }),
    ],
    server: {
        host: '0.0.0.0',
        port: 5173,
        strictPort: true,
        cors: true, // explicitly allow cross-origin requests
        origin: process.env.DDEV_PRIMARY_URL ? `${process.env.DDEV_PRIMARY_URL}:5173` : undefined,
        hmr: {
            host: process.env.DDEV_HOSTNAME,
            protocol: process.env.DDEV_HOSTNAME ? 'wss' : 'ws',
        },
    },
});
With that config saved, running ddev npm run dev brought the hot-reloading frontend to life instantly.
Since DDEV completely replaced my need for tools like Valet, Sail, and heavy database managers, I rely on a handful of commands to get through the day. The best part is that I don't need to constantly drop into an SSH session to run my scripts.
Here’s a quick reference for the commands I use constantly directly from my Mac's terminal:
ddev start / ddev stop: Turns the current project on or off.ddev poweroff: Shuts down every single DDEV container and background process across the whole Mac.ddev composer [command] & ddev artisan [command]: This was a game-changer for my workflow. Instead of jumping into the container or worrying about local PHP versions, I just prepend ddev to my usual commands right from my Mac terminal (e.g., ddev artisan migrate or ddev composer require). DDEV acts as a seamless proxy, passing the command directly to the isolated PHP container.ddev npm [command]: The exact same principle applies to Node. Running ddev npm install or ddev npm run dev executes perfectly inside the container environment, keeping your local machine completely insulated from rogue node_modules quirks.ddev ssh: Drops you straight into the container's terminal. I only really use this if I need to chain a bunch of complex commands together in a row.ddev describe: Shows all the URLs, port numbers, and database credentials for the current project.ddev logs: Helpful when Nginx or PHP throws an error and you need to see the raw server logs.DDEV knows how to auto-configure Nginx and PHP for almost anything. When setting up a new folder, you just tell it what you're building:
ddev config --project-type=laravel --docroot=publicddev config --project-type=wordpress (It handles all the WP rewrites perfectly out of the box).One of the biggest headaches of older local environments was linking and unlinking Homebrew packages just to run a legacy app on PHP 7.4, and then switching back to 8.3 for a new project.
With DDEV, swapping PHP versions is just a single config flag. It leaves my Mac completely untouched and rebuilds only the container:
ddev config --php-version=8.3
ddev restart
By default, DDEV spins up MariaDB. But if a client needs PostgreSQL, I don't need to install a heavy Postgres app on my Mac. I just tell DDEV to swap the engine during setup:
ddev config --database=postgres:15
(You can do the same for mysql:8.0 or different MariaDB versions).
This was the final piece of the puzzle. I used to keep heavy Electron database clients running all day just to inspect tables. To stick to my lightweight philosophy, I use the DDEV phpMyAdmin add-on. To add it to any project, you simply install the add-on once:
ddev get ddev/ddev-phpmyadmin
ddev restart
When I need to look at the database, I just run:
ddev phpmyadmin
It instantly opens phpMyAdmin in the browser, already authenticated and connected to that specific project's container. No connection strings, no port hunting, and no heavy apps sitting in the background.
Because I wear so many hats during the day, the biggest advantage of this containerized approach becomes obvious the second I'm done touching code. On my old setup, even after closing my IDE, there were MySQL background processes running, Homebrew services silently ticking, and Node modules stuck in memory while I was trying to edit a video or hop on a Zoom call.
Now, when I'm ready to switch gears, I open my terminal and type one command:
ddev poweroff
This safely spins down every single container and background router across all my projects. I look at iStat Menus and watch the system instantly reclaim 100% of its memory. No lingering database processes, no bloated electron apps sitting in the menu bar. Just a perfectly clean, pristine Mac, ready for whatever is next.

This is the exact methodology that finally brought peace to my macOS experience, but I am always looking for ways to refine it. To all my developer friends reading this: what are your hot tips? Do you have any lightweight tools, menu bar apps, or terminal hacks you absolutely cannot live without?
Drop a comment below or reach out to me on social media. I would love to hear how you keep your own machines running pristine!
